Non Destructive Testing by means of X-ray technologies: main clues of Radioscopy and Computed Axial Tomography tests
The inspection of solid materials and components (metallic and non-metallic) by means of X-ray technologies allows to check their internal soundness and/or to discover defects, that cannot be detected without destroying the analyzed object.
The standardization of the execution processes of X-ray inspections and of the interpretation of images (aided by a significant improvement in the image quality) has contributed to settle these testing methods that, currently, are highly demanded by sectors with very high quality requirements, such as in the automotive sector or in aeronautics. The main fields of application of the X-ray technologies are focused on homologating new designs, measuring the internal porosity of components in compliance with VDG parameters, or in the continuous improvement of transformation processes.
Anyway, the acknowledgement of the capacities and characteristics of X-ray technologies brings along many doubts and confusions referred to what can be “inspected or seen” by means of the different analytical techniques. Indeed, the wrong idea that “everything inside an element can be seen” is very widespread… which is quite far from reality.
Among the Non Destructive Tests, Radioscopy and Computed Axial Tomography are the most used ones among industrial level serial component manufacturers. Radioscopy offers real time images of the analyzed object through a TFT-LCD monitor. It is especially appropriate for evaluating the behaviour of the elements observed during dynamic processes, because it allows manipulating and moving objects to obtain different views or visualizing objects, both static and in movement. Regarding Axial Computed Tomography, this technique consists on obtaining images of different sections of the component so, layered one on top of each other, a 3D image of the full object can be recreated.
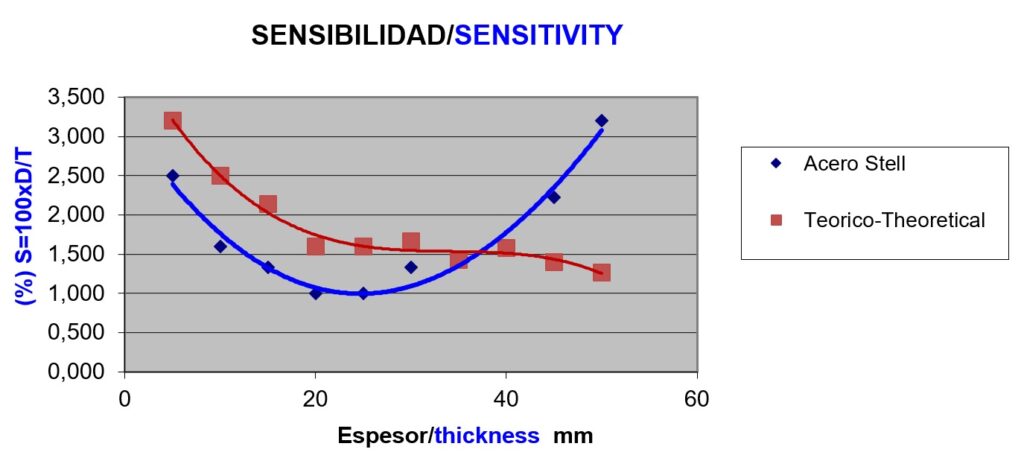
“Radioscopy equipment offer different sensitivity and detection possibilities. Indeed, filters that can notably improve detection capacities can be applied.”
In both cases, the success level of the inspection of any object depends on the following factors:
- Sensitivity of the equipment used for the study.
- The definition level of what is wanted to be observed.
- The expert knowledge of the technician who executes the inspection.

When it comes to the sensitivity of radioscopic equipment involved in a specific test, different levels of sensitivity can be used that equal or surpass the applicable standard. In that way, even if the equipment and standard requirements are met, the detection capacity may be different. Filters that can notably increase the detection capacity can also be applied, even though these filters might not be appropriate to check every material and thickness level.
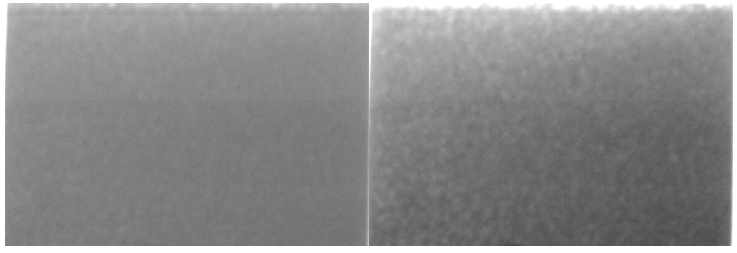
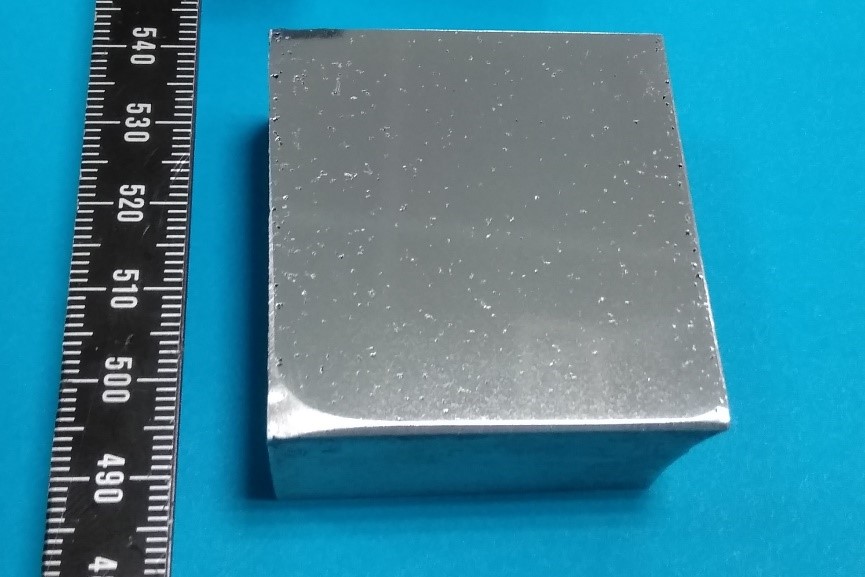
The following images, taken during a radioscopy test performed at IK4-AZTERLAN Metallurgy Research Centre, show examples of the diverse views that can be obtained over a component full of porosity applying different X-ray energy rates and different filters. All the scenarios comply with the basic radiography image quality requirements defined by the applicable standard.

Imagen radioscópica a 100KV y a 120KV

Imagen radioscópica a 320KV
It must be outlined that IK4-AZTERLAN has a Computed Axial Tomography equipment of 450KV with a high penetration capacity and a radioscopy equipment of 320KV, that has been updated and renewed with a tube and a high-performance detector for a wide range of pieces and thicknesses. Also, more than 20 years of experience performing NDT entitle our team of professionals with a know-how that makes it possible to apply the most suitable techniques and characteristics to inspect the different components to be analyzed.
How to approach a correct testing by means of X-ray technologies
Any X-ray test must be performed by qualified technicians, following previously defined specifications. It should be kept in mind that the analysis of discontinuities or defects by non-qualified personnel could lead to wrong interpretations. That way, a non-experimented observer could miss existing discontinuities or, on the contrary, he/she could observe actual discontinuities without being able to evaluate their severity level.
In the same way, the own characteristics of each component and its further application requirements make it mandatory to evaluate each component with specific criteria. For instance, defects of similar characteristics might have totally different implications for a 200 kg piece or for a 4 kg piece and therefore, should not be equally evaluated.
A usual mistake made when requesting an X-ray inspection begins commonly with the initial approach to the inspection. Often, clients that request an inspection of the internal soundness of a component ask for “the smallest defect” that can be detected. Usually this is not a good starting point for an inspection. On the contrary, a proper first question would be: which defect do we want to detect, that could really affect the quality and the properties of the component?
When performing the inspection and depending on the requirements of the piece (or the specific requests by the solicitor), the most suitable sensitivity and filter choice is made. This choice does not necessarily have to correspond to the maximum sensitivity level that the equipment can achieve.

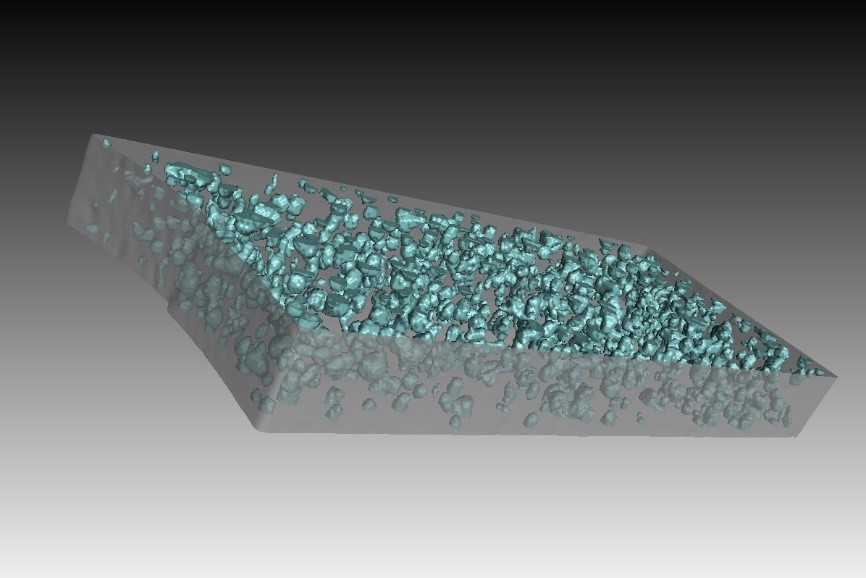
Visualización de la zona de porosidad mediante la tomografía axial computerizada

Imágenes del defecto en 3 planos de corte a 90º obtenidas mediante tomografía axial computerizada

Following the same criteria, parts or components cannot be observed in an isolated way. If a defect is detected, more information on how it can affect the life service of the component under analysis is required. For that purpose, comparative patterns or applicable standards are required to check if the component will fulfill specific requirements, even though this will not tell if it is functional or not.
In fact, the applicable regulation, even though it helps to unify examination criteria, presents some limitations as well when it comes to defining whether the size of a defect can be critical or not, for different parts with different designs and for different applications.
For this reason, the NDT team of IK4-AZTERLAN helps their customers to define the scope and the analysis possibilities to proceed within an inspection. The aim of this step is to obtain the maximum information available about the part or component under analysis and to provide further on the most adequate response to the specific needs and requirements from the customer.
This information is of vital importance to estimate the optimal sensitivity to proceed with the X-ray analysis and to provide results that correspond to the real problem to be addressed. This is the only way that the X-ray inspections can focus on the problem, avoiding false interpretations and evaluating the actual relevance of potential discontinuities on the performance of the piece.


